In my last post - Azure Pipelines YAML - Uh, what do I type? - I gave you two suggestions for how to find out what to type - both links to the docs.
Shortly after publishing, a few people from the awesome DevOps community recommended a few other ways, so I thought I'd share them. I totally already knew about all of them of course. Absolutely definitely.
So, more answers!
Answer #3 - Use the Visual Designer
But wait, Damian, isn't the whole point that we're not using the visual designer?
Yes. Yes, it is. However it can be very useful to use the visual designer just so you can then view the equivalent YAML.
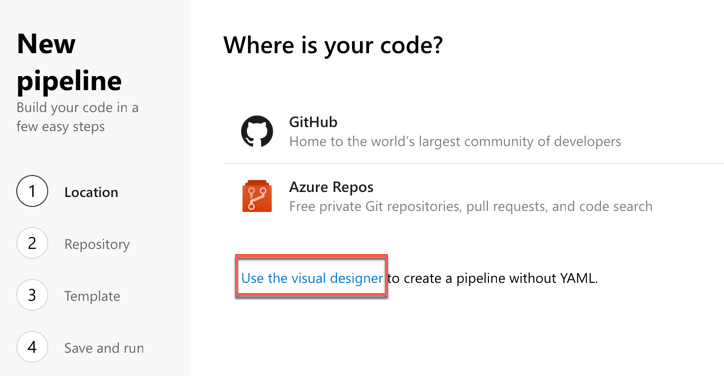
To create a build with the visual designer, there's a not terribly obvious link in step 1 of the New Pipeline flow.

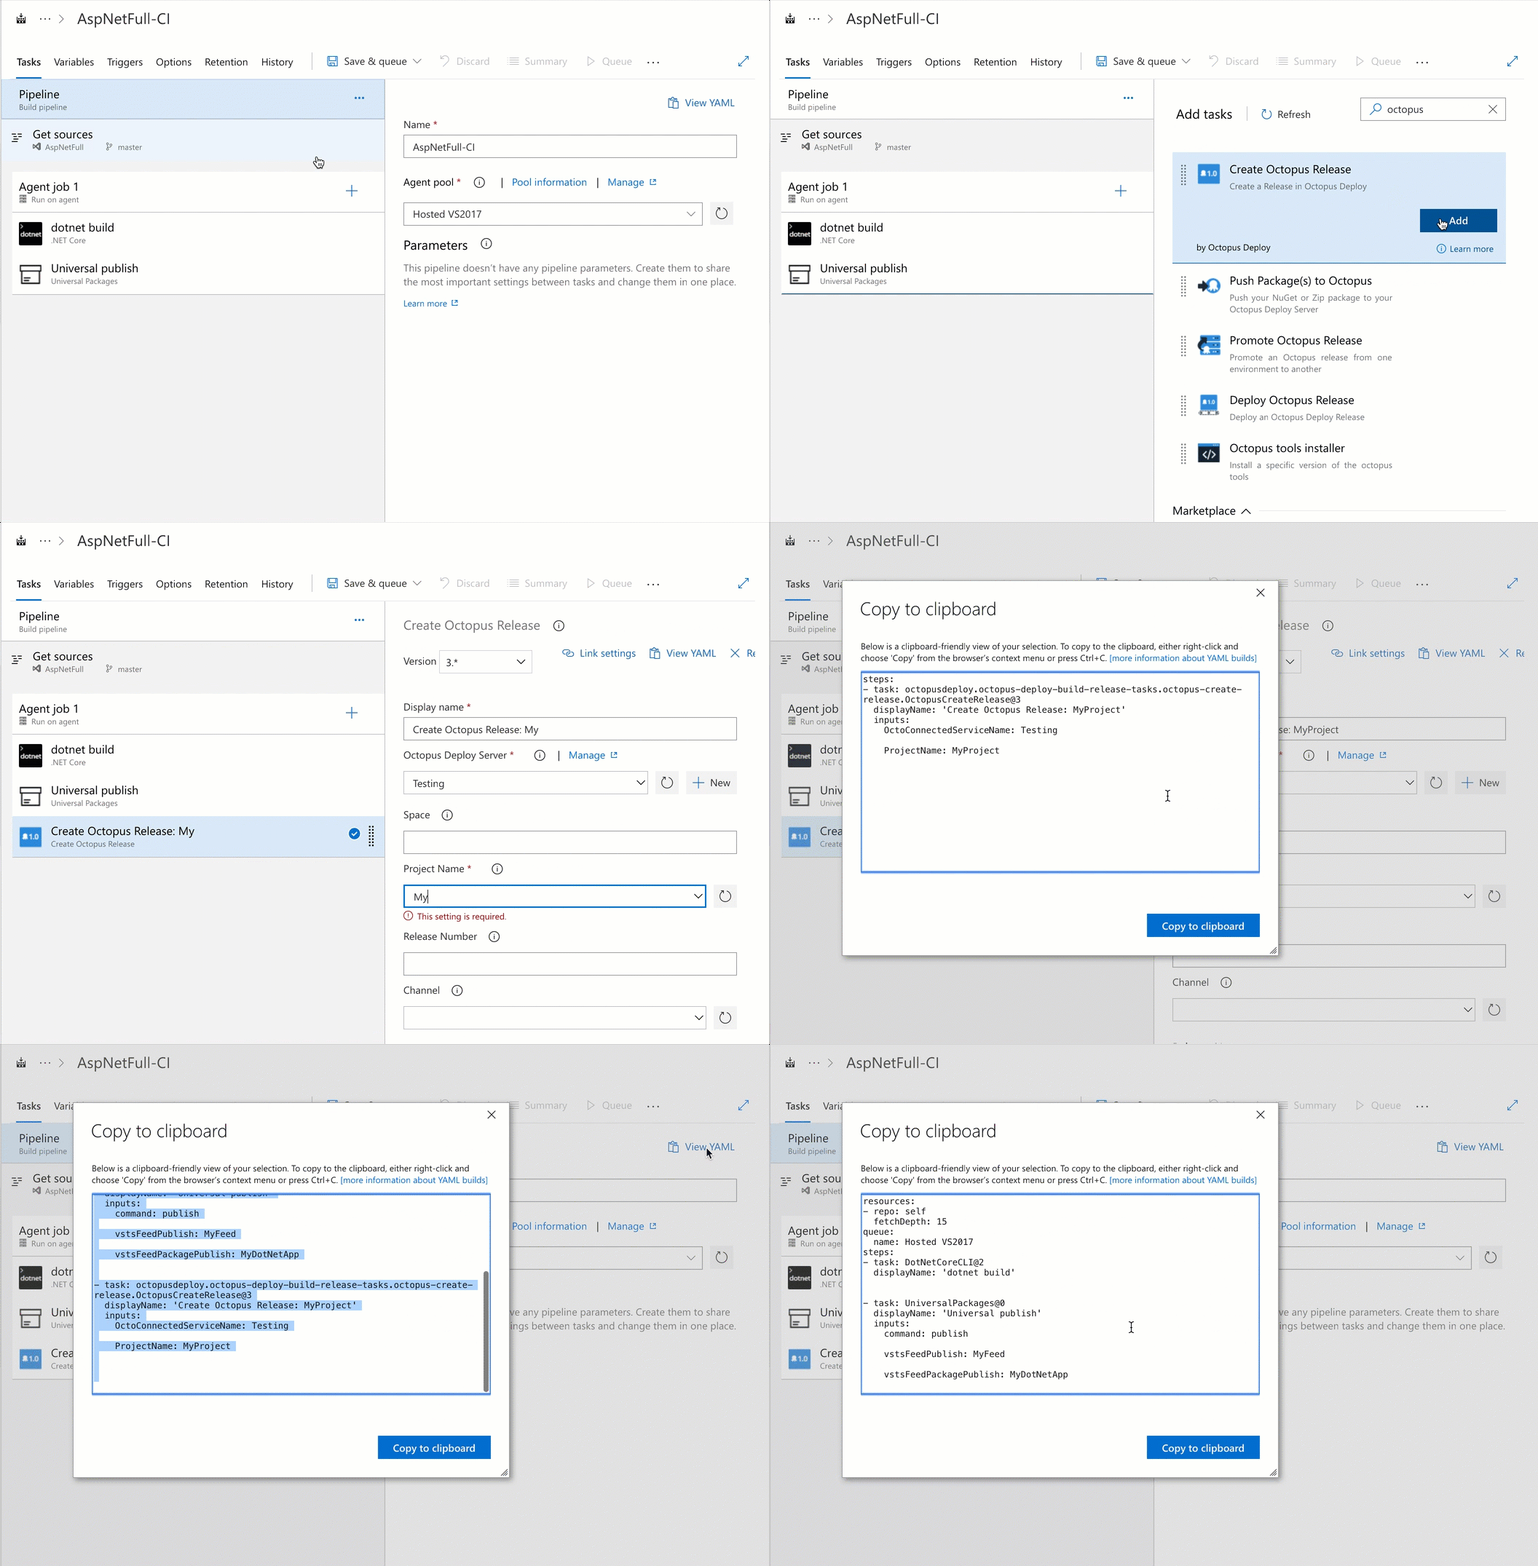
The YAML required for tasks is usually very straightforward, but by using the visual designer, you get a UI showing you every possible parameter.
It's especially useful for tasks you're unfamiliar with, or marketplace tasks where the YAML isn't documented or obvious. The name of those tasks is usually very long as well.
Just add the task, set the parameters, then click "View YAML". You can also "View YAML" for the whole pipeline if you want to build it with the UI but use YAML.

It's a bit like using the Visual Studio ASPX design view in old-school Web Forms before switching back to source view to see what OH NO WHERE DID ALL THESE BR TAGS COME FROM WHY WOULD YOU DO THIS!?

Ok, it's not completely like that.
Answer #4 - look at the task's git repo
Every out-of-the-box task in Azure Pipelines is open source. If that surprises you, you haven't been paying attention to this new Microsoft!
You can find all these tasks on GitHub at https://github.com/Microsoft/azure-pipelines-tasks in the Tasks folder. At time of writing, there are 135 of them.
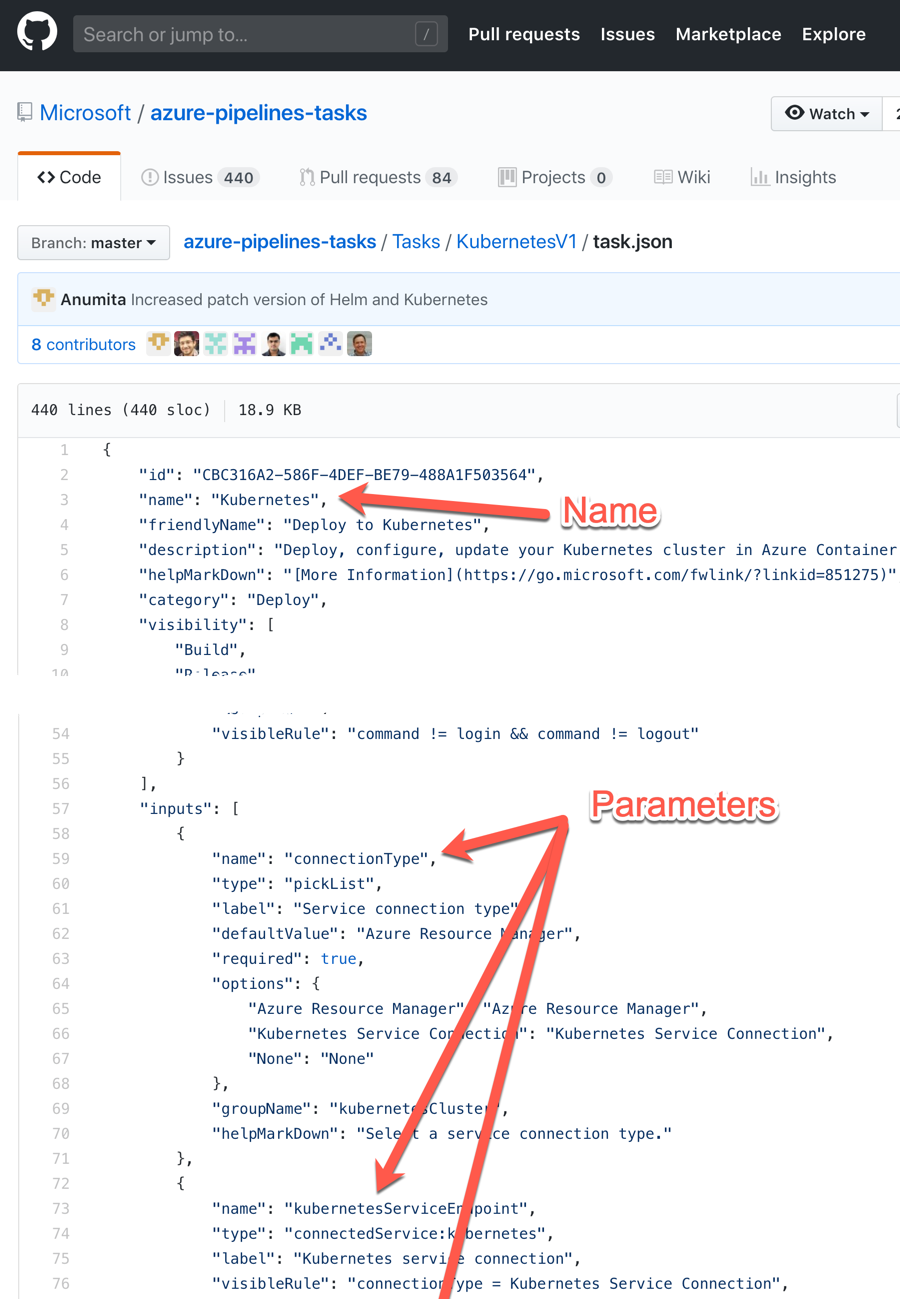
To help you work out the YAML, the file you're looking for is task.json. Here's an example for the Kubernetes task (version 1): https://github.com/Microsoft/azure-pipelines-tasks/blob/master/Tasks/KubernetesV1/task.json

The name of the task is the name in the json file plus the version - e.g. Kubernetes@1.
The json file also contains all the possible input parameters you can use.
It can take a little bit of practice to understand these json files, but as a bonus - once you understand them, you can write your own tasks! That's right, just copy ours to create your own!
Answer #5 - More comprehensive docs
I kind of covered this in the first post, but it deserves another mention because I didn't link to it specifically.
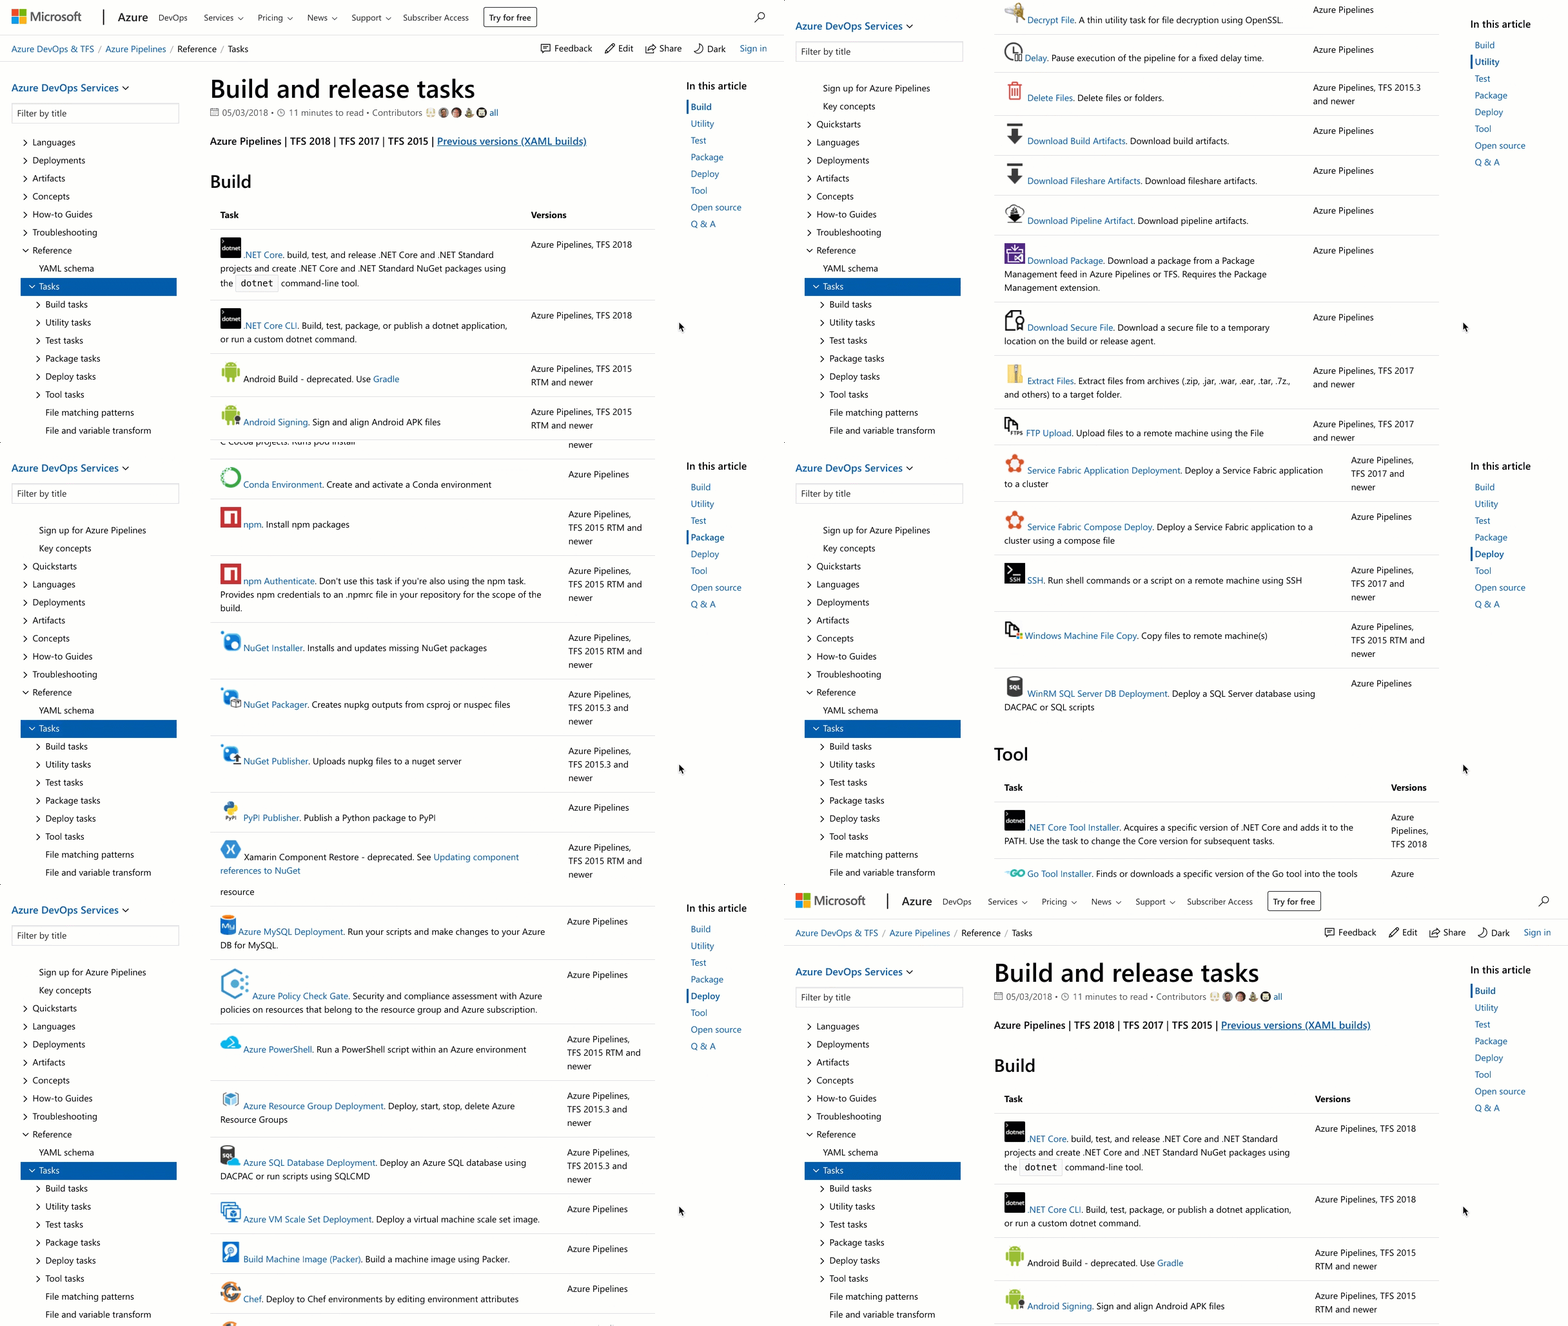
There's a reference section in the Azure Pipelines docs that lists every out of the box task along with the YAML required to use it.

Unlike the quickstarts or language-specific guidance, the reference section lists every parameter each task can use. It's far more comprehensive and is extremely useful if you need to drill down a bit deeper.
Check it out. Again.
It's incredibly easy to get started with Azure Pipelines, especially if you have your code in GitHub already. Just add the Marketplace app and follow the prompts.
Does your code live somewhere else? No problem, just go to https://dev.azure.com and create a new organization and project.
And once again, Azure Pipelines is free. Not add-a-credit-card-but-make-sure-you-cancel-3-months-before-the-trial free, but totally free.