It's really important to have a TFS Master as part of your team. As the TFS Master at SSW (amongst other things), I'm constantly looking out for best practices, improvements we can make, and problems we can avoid. In particular, we like to keep our Team Foundation Server nice and clean, making sure the devs have no abandoned changes or workspaces.
Periodically, I'll send out an email to anyone who has files they haven't checked in for a while as per our "Do you have a report to see who has not checked in?" rule. What I often hear back is that the files have been checked out in a workspace that no longer exists. In other words the files were edited, not checked in, then the computer was rebuilt or replaced.
So what can you do?
The best option is to remove any workspaces you no longer have access to. There are two ways to do this:
- Use the awesome Team Foundation Sidekicks product
- Use the Workspaces tool in Visual Studio
Option 1 - Using Team Foundation Sidekicks
- Download Team Foundation Sidekicks 5.0
- Connect to your Team Foundation Server
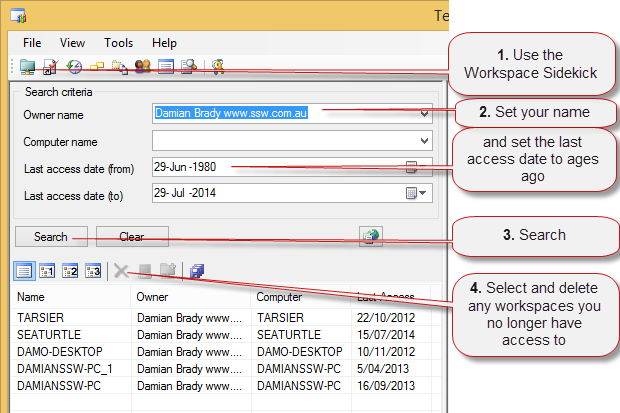
- Use the Workspaces Sidekick to find and remove any workspaces you no longer use
 Using Team Foundation Sidekicks to remove Workspaces
Option 2 - Using the Workspaces tool in Visual Studio
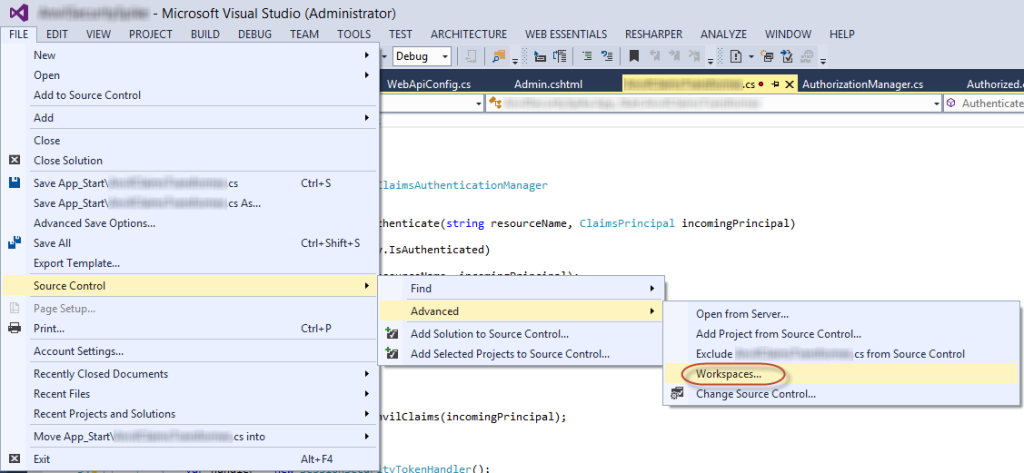
- In Visual Studio, go to File | Source Control | Advanced | Workspaces...
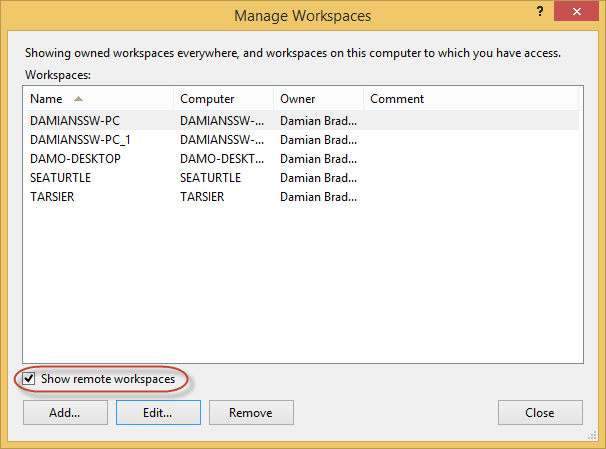
- Check the Show remote workspaces checkbox to see workspaces on every computer
- Select and click Remove for the workspaces you no longer use
 Opening TFS Workspaces in Visual Studio
 The Workspaces Dialog in Visual Studio
Clearing out these abandoned workspaces will let the TFS server know you aren't using those workspaces any more. Best of all, your TFS Master will be less likely to send out angry emails!