A few months ago, a preview feature was launched in Azure DevOps (then VSTS), letting you define your build in a YAML file that lived with your code.

This was awesome. It meant you could use the same branching and code review practices for your build definitions as you did for your code.
Now with the launch of Azure DevOps (which, by the way, is free), the service really encourages using YAML. In fact, if you start a new project, those feature flags are turned on by default, and the flow through the GitHub Marketplace app also pushes you to a YAML definition.
However, if you're like me and were used to the UI, or you're just completely new to Azure DevOps, it could be a bit confusing.
Namely - uh, what do I actually put in the YAML file?

Note: If you do want to keep using the UI, you can turn the feature off by following the instructions here.
Answer #1 - the templates
There are a whole lot of templates available for you to choose from and they contain some nice starting points.
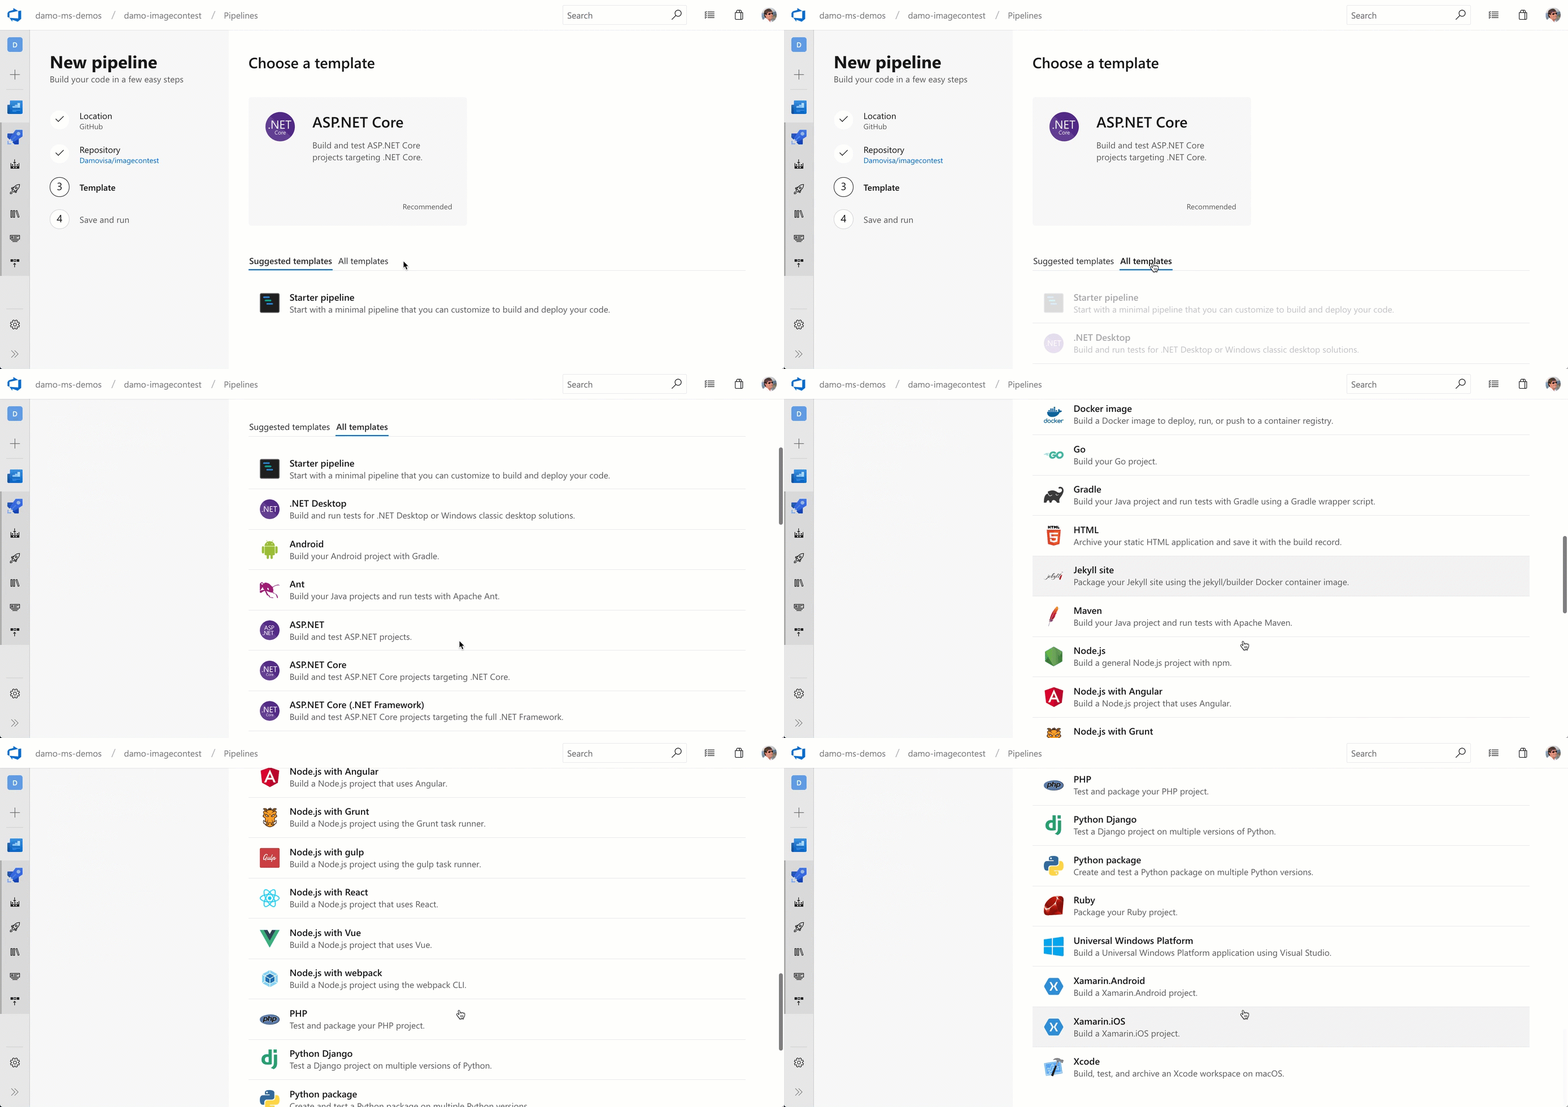
When you create a new build definition, Azure Pipelines analyzes your code (at a pretty high level) and will suggest a template to start with. Or you can click "All templates", and pick one. There are quite a few!

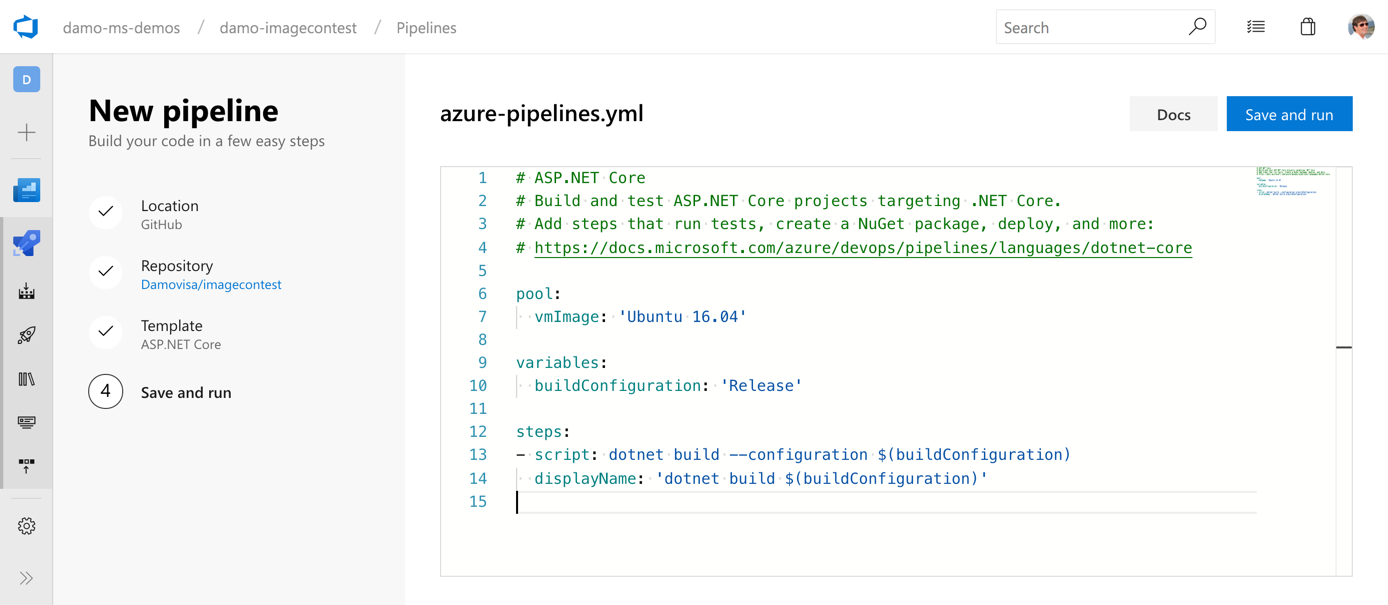
In most cases, this will be a super simple definition that just builds the app. For example, the ASP.NET Core template (see the screenshot above) has a single step that runs dotnet build on the commandline.
Even if you plan to build out a task-rich build, the templates are a good place to start for a couple of reasons:
-
First, they show you the syntax you'll need, and will already have the recommended build agent pool, variables, and basic tasks set.
-
Second, there's a link at the top of the template that points you at the documentation for that specific project type. Which is exactly what you need right now.
So choose a template that makes sense, then [ctrl/⌘]-click on that link. It'll tell you the YAML you'll need for pretty much everything you'll want to do. If it doesn't, let me know and I'll get it fixed!
For example, here's what my ASP.NET Core build looks like. Every task I added is listed in the docs page linked to in the header - https://docs.microsoft.com/azure/devops/pipelines/languages/dotnet-core
# ASP.NET Core
# Build and test ASP.NET Core projects targeting .NET Core.
# Add steps that run tests, create a NuGet package, deploy, and more:
# https://docs.microsoft.com/azure/devops/pipelines/languages/dotnet-core

pool:
  vmImage: 'Ubuntu 16.04'

variables:
  buildConfiguration: 'Release'

steps:
- script: dotnet restore
  displayName: 'dotnet restore'

- script: dotnet build --configuration $(buildConfiguration)
  displayName: 'dotnet build $(buildConfiguration)'

- task: DotNetCoreCLI@2
  displayName: 'dotnet test $(buildConfiguration)'
  inputs:
    command: test
    projects: '**/*Tests/*.csproj'
    arguments: '--configuration $(buildConfiguration) --collect "Code coverage"'

- task: DotNetCoreCLI@2
  displayName: 'dotnet publish $(buildConfiguration)'
  inputs:
    command: publish
    publishWebProjects: True
    arguments: '--configuration $(BuildConfiguration) --output $(Build.ArtifactStagingDirectory)'
    zipAfterPublish: True

- task: PublishBuildArtifacts@1
  displayName: 'publish artifacts'
That definition restores, builds, runs tests, pushes test results and code coverage back to Azure DevOps, packages the site for deployment, and pushes the packaged artifact back to Azure DevOps for safekeeping.
Answer #2 - the "Docs" button
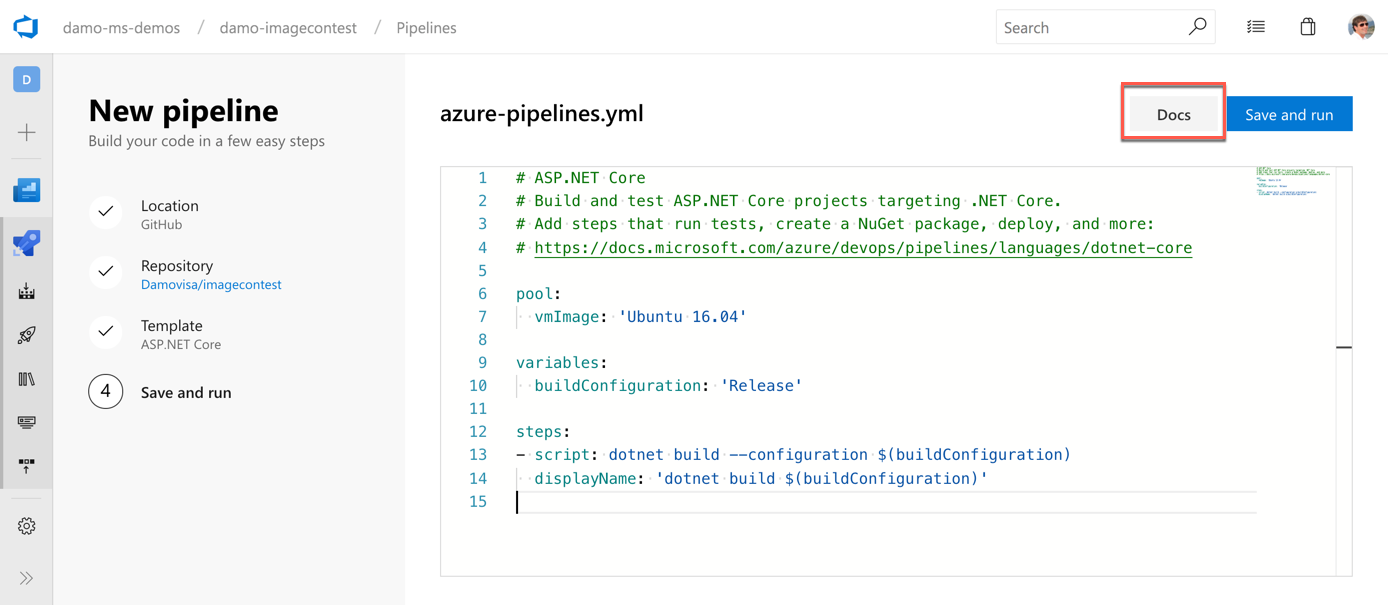
You may have noticed the "Docs" button at the top of the screenshot as well. To save you scrolling, I'll paste it again:

That link takes you to an awesome docs page with links to quickstarts for (at time of writing) 15 different app types. There are also some links to pages showing how to deploy to 11 different deployment targets.
I firmly believe you should deploy with a separate Release pipeline (build once, deploy many!), but you can do it in the build if you want. It's yours, you can do whatever you like!
Check it out
It's incredibly easy to get started with Azure Pipelines, especially if you have your code in GitHub already. Just add the Marketplace app and follow the prompts.
Does your code live somewhere else? No problem, just go to https://dev.azure.com and create a new organization and project.
No credit card required - it's free. Did I mention that? Free!